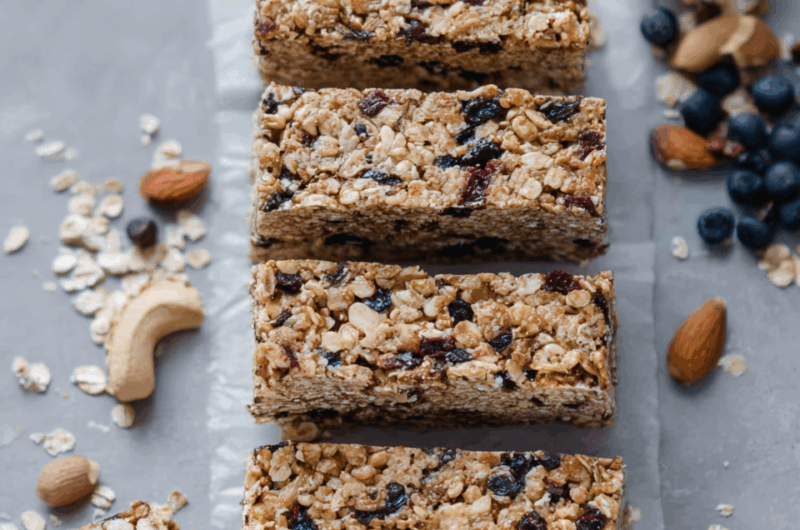
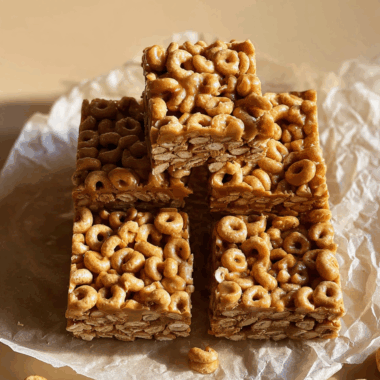
These No-Bake Granola Bars are an effortless take on homemade energy bars—chewy, lightly spiced with cinnamon, and sweetened naturally with maple syrup and nut butter. The simplicity of the ingredients shines through, and you can transform each batch with mix-ins to suit your taste or pantry stash. Perfect for breakfast on the run, lunchbox extras, or a wholesome snack with your afternoon coffee, these bars pack both nutrition and flavor. The no-bake method makes this an ideal recipe when oven-free prep is a priority. Store them in the fridge for a firmer texture or at room temperature for a softer, chewier experience.
Full recipe:
Ingredients:
-
2 cups quick-cooking or rolled oats
-
1 teaspoon ground cinnamon
-
¼ teaspoon salt
-
¼ cup pure maple syrup or agave nectar
-
¾ cup nut butter (e.g., almond, peanut, or sunflower seed butter)
-
1 teaspoon vanilla extract
(Optional additions: mini chocolate chips, dried fruit, chopped nuts, shredded coconut, seeds like sunflower or chia)
Directions:
-
In a large bowl, whisk together oats, cinnamon, and salt.
-
Stir in the maple syrup, nut butter, vanilla, and any optional mix-ins until thoroughly combined.
-
Press the mixture firmly into an 8×8-inch pan lined with parchment paper, using the bottom of a glass if needed for even compression.
-
Refrigerate for 1–2 hours until set.
-
Remove from pan using parchment overhang and slice into 8 bars.
Prep Time: 5 minutes | Setting Time: 60–120 minutes | Total Time: approx. 2 hours
Kcal: approx. 200–300 kcal per bar (varies with add-ins) | Servings: 8 bars
No-Bake Granola Bars – The Easiest Homemade Snack You’ll Ever Make
Sometimes, the simplest recipes are the ones we come back to again and again. That’s exactly the case with these No-Bake Granola Bars—chewy, naturally sweetened, packed with wholesome ingredients, and ready with minimal effort. You don’t need an oven, fancy equipment, or hours in the kitchen. Just a few pantry staples, five minutes of mixing, and some time in the fridge, and you’ve got a snack that’s better than anything in a store-bought wrapper.
If you’ve been searching for a recipe that hits the sweet spot between healthy and treat, this is it. These bars are versatile enough for breakfast, perfect for lunchboxes, and satisfying enough to curb mid-afternoon cravings.
A Short History of Granola Bars
Granola itself dates back to the late 1800s, but the granola bar as we know it didn’t take off until the mid-20th century. As health food movements grew, people wanted something portable, nutrient-dense, and easy to eat on the go. By the 1970s, granola bars had entered mainstream grocery stores, marketed as a “healthy snack alternative.”
The downside? Many commercial granola bars, even today, are loaded with refined sugars, preservatives, and fillers. This no-bake version strips away the unnecessary additives and focuses on whole, nourishing ingredients. It’s the homemade answer to the overly processed bars lining supermarket shelves.
Why These No-Bake Granola Bars Are the Best
There are dozens of no-bake granola bar recipes out there, so what makes this one so special?
-
Pantry Ingredients – Everything you need is probably already in your kitchen.
-
Customizable Flavor – Swap in your favorite nut butter, sweetener, and mix-ins.
-
Naturally Sweetened – Maple syrup or agave keep it refined-sugar-free.
-
Five-Minute Prep – The longest part is waiting for them to set.
-
Nutritionally Balanced – Healthy fats, complex carbs, fiber, and a touch of protein in every bite.
This recipe is also vegan-friendly and can easily be made gluten-free with certified GF oats.
Nutritional Benefits of the Ingredients
-
Oats – Rich in soluble fiber (especially beta-glucan), oats can help regulate blood sugar and keep you full longer.
-
Nut Butter – A great source of healthy fats, plant-based protein, and minerals like magnesium.
-
Maple Syrup or Agave – Natural sweeteners that bring flavor without the need for refined sugar.
-
Cinnamon – A warm spice with antioxidant properties, which can help reduce inflammation.
-
Optional Mix-Ins – Nuts, seeds, and dried fruit add extra vitamins, minerals, and texture.
These aren’t just snacks—they’re fuel for your body, whether you need a quick breakfast or post-workout energy.
Perfect for Every Lifestyle
One of the best things about no-bake granola bars is how adaptable they are to different routines:
-
Busy mornings – Grab a bar with coffee and you’re out the door.
-
Office snacks – Keep them in your desk drawer for a healthy alternative to vending machines.
-
Kids’ lunchboxes – They travel well and can be made nut-free with sunflower seed butter.
-
Outdoor adventures – Hiking, biking, camping—these bars hold up without refrigeration for several hours.
How to Customize Your Bars
The base recipe is fantastic as is, but you can change it up endlessly:
-
Chocolate Lover’s Version – Add mini chocolate chips or a drizzle of melted dark chocolate.
-
Tropical Twist – Add shredded coconut, dried pineapple, and macadamia nuts.
-
Protein Boost – Mix in a scoop of plant-based protein powder.
-
Berry Burst – Add dried cranberries, blueberries, or strawberries.
-
Seed Mix – Pumpkin, sunflower, or chia seeds for extra crunch and nutrition.
Tips for Perfect No-Bake Granola Bars
-
Press Firmly – The tighter you press the mixture into the pan, the better the bars hold together.
-
Cool Completely – Don’t rush the setting process; refrigeration is key for clean slicing.
-
Line Your Pan – Use parchment paper with overhang so you can lift the bars out easily.
-
Adjust Texture – Too dry? Add a little more nut butter. Too sticky? Stir in more oats.
-
Cut with a Sharp Knife – For clean edges, use a long, sharp chef’s knife and wipe it between cuts.
Storage and Shelf Life
These bars will keep for up to a week in an airtight container in the fridge. If you prefer a softer texture, store them at room temperature for up to 3–4 days. They can also be frozen—just wrap individually and store in a freezer bag for up to 2 months.
Why Homemade Beats Store-Bought Every Time
-
No preservatives – Just wholesome ingredients you recognize.
-
Cheaper – Store-bought bars often cost $1–$2 each; homemade versions are a fraction of the price.
-
Better taste – Fresh nut butter, real oats, and natural sweeteners give a richer flavor.
-
Zero waste – Make them in bulk and reduce packaging waste.
Pairing Ideas
-
Morning coffee or tea – A bar with a latte makes a balanced breakfast.
-
Yogurt – Crumble over Greek yogurt with fresh fruit for a quick parfait.
-
Smoothies – Enjoy alongside a green smoothie for a post-workout meal.
-
Cheese – For a savory-sweet combo, pair with a slice of sharp cheddar.
Conclusion
These No-Bake Granola Bars are more than just a snack—they’re a habit you’ll want to keep. With a recipe this easy, there’s no reason to rely on expensive, processed energy bars. They’re proof that healthy eating doesn’t have to be time-consuming or complicated. The next time you’re tempted by a candy bar or overpriced “healthy” snack, remember: with oats, nut butter, and a few simple pantry staples, you can whip up a batch of chewy, wholesome bars in minutes. Store them in your fridge, and you’ll always have a grab-and-go option ready to fuel your day.


