

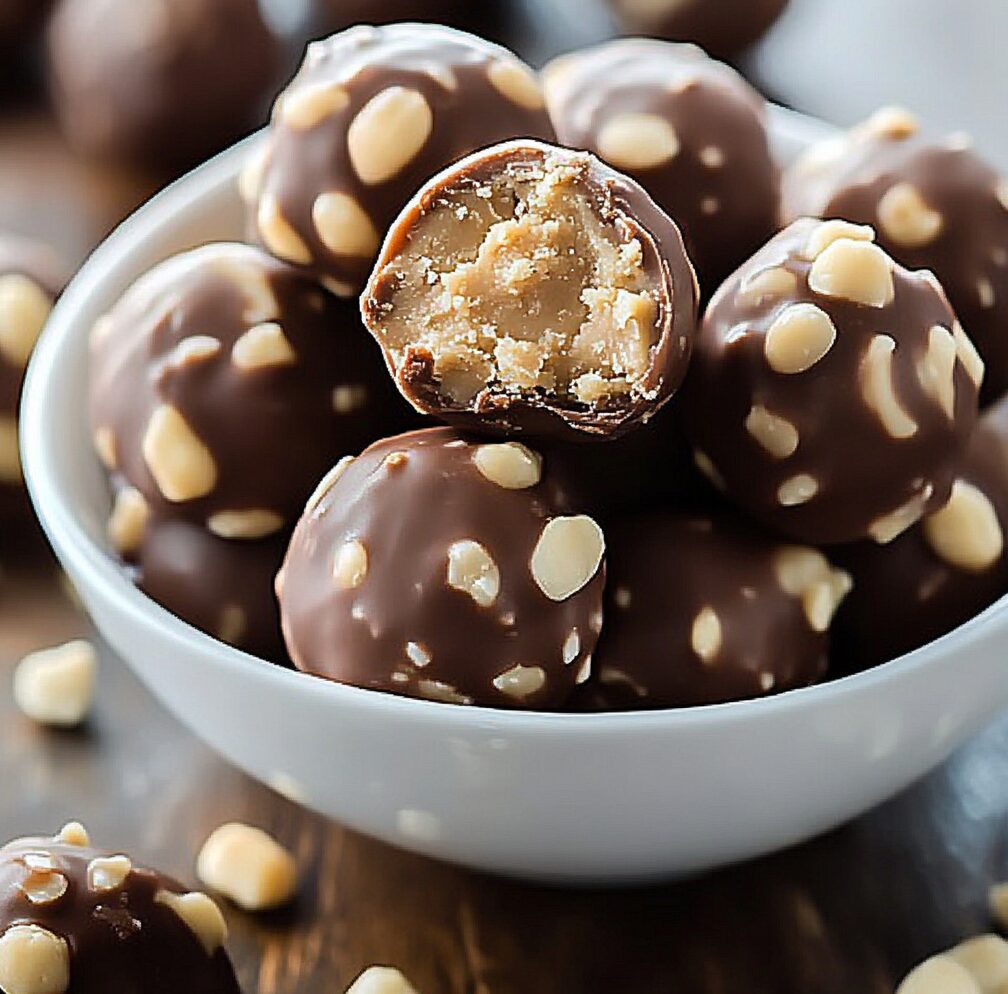
The classic combination of peanut butter and chocolate comes together beautifully in this easy and festive holiday treat. These Peanut Butter Balls are rich, creamy, and perfect for sharing during the holiday season. Whether you’re preparing for a Christmas party or just looking for a simple homemade candy to satisfy your sweet tooth, this recipe is a must-try. The no-bake nature of these truffles makes them a breeze to whip up, and their delightful taste will leave everyone reaching for seconds.
Full recipe:
Ingredients:
- 1 cup creamy peanut butter
- 1/4 cup unsalted butter, softened
- 2 cups powdered sugar
- 2 cups semi-sweet chocolate chips
- 2 tablespoons shortening
Directions:
- In a large mixing bowl, combine peanut butter and softened butter until smooth.
- Gradually mix in powdered sugar until a firm dough forms.
- Roll the mixture into 1-inch balls and place them on a baking sheet lined with wax paper.
- Chill the peanut butter balls in the refrigerator for at least 30 minutes.
- Melt chocolate chips and shortening together in a microwave-safe bowl in 30-second intervals, stirring until smooth.
- Dip the chilled peanut butter balls into the melted chocolate using a fork or toothpick, ensuring they are fully coated.
- Place the coated balls back on the wax paper and allow the chocolate to set.
- Chill again until the chocolate hardens. Store in an airtight container in the refrigerator.
Prep Time: 20 minutes | Chill Time: 30 minutes | Total Time: 50 minutes
Kcal: 130 kcal per serving | Servings: 24 servings

The Delightful History and Appeal of Peanut Butter Balls
Peanut Butter Balls are a quintessential holiday treat that brings nostalgia, flavor, and simplicity to your dessert table. This no-bake candy has been a favorite across generations, combining the creamy richness of peanut butter with the decadence of chocolate. These bite-sized indulgences originated as a homemade solution to satisfy the cravings for candy-like confections without requiring special equipment or advanced baking skills. Over time, they became a cherished tradition for Christmas gatherings, potlucks, and gift baskets.
Unlike elaborate desserts that demand hours in the kitchen, Peanut Butter Balls offer a fuss-free preparation process, making them a perfect choice for busy holiday seasons. The ingredients are pantry staples, ensuring that you don’t have to make an extra trip to the store. Plus, they’re an excellent recipe for getting the family involved—kids love rolling the peanut butter mixture into balls and helping dip them in melted chocolate.
Why This Recipe Stands Out
This recipe’s simplicity is only one reason it’s a winner. The combination of flavors is another. The salty-sweet harmony of peanut butter and chocolate has universal appeal, pleasing both kids and adults alike. Using semi-sweet chocolate keeps the sweetness balanced, while the addition of shortening ensures a glossy, professional finish for the chocolate coating.
Unlike store-bought chocolates, these homemade treats allow you to control the ingredients. You can opt for organic peanut butter, use high-quality chocolate, or even make them vegan by choosing dairy-free alternatives. They’re naturally gluten-free, making them suitable for those with dietary restrictions.
Additionally, the portability of Peanut Butter Balls makes them a favorite for holiday cookie exchanges or as edible gifts. Pack them in festive tins, wrap them in decorative cellophane, or place them in small candy boxes for a thoughtful and delicious homemade present.
Benefits of Peanut Butter Balls
- Ease of Preparation: With no oven required, these are perfect for those who are new to making homemade treats.
- Customizable: You can tweak the recipe to suit your taste. Add a sprinkle of sea salt on top for a salted caramel vibe, or mix in crushed pretzels for added crunch.
- Dietary-Friendly: Naturally gluten-free, and easily adaptable for dairy-free or vegan diets by swapping a few ingredients.
- Perfect for Gifting: Their rich flavor and attractive appearance make them a crowd-pleaser in any setting.
- Great Shelf Life: Stored in the refrigerator, these can last up to two weeks, making them ideal for preparing in advance of holiday parties or events.
Tips for Making the Best Peanut Butter Balls
- Choose High-Quality Ingredients: Since this recipe is simple, the quality of your ingredients will shine through. Opt for a good-quality peanut butter and chocolate for the best results.
- Chill the Mixture Thoroughly: Ensuring the peanut butter mixture is firm before dipping prevents the balls from falling apart in the chocolate.
- Use a Fork for Dipping: A fork allows excess chocolate to drip off easily, preventing a thick, uneven coating.
- Decorate for Festivity: Drizzle white chocolate over the finished balls for a decorative touch, or sprinkle with festive toppings like crushed candy canes or edible glitter.
- Store Properly: Keep them in an airtight container in the refrigerator to maintain their texture and flavor.
Fun Variations to Try
While the classic Peanut Butter Balls are delightful as is, you can experiment to create your own signature twist:
- Crunchy Peanut Butter Balls: Use crunchy peanut butter instead of creamy for added texture.
- Nut-Free Version: Substitute sunflower seed butter or soy nut butter for those with nut allergies.
- Dark Chocolate Delight: Swap semi-sweet chocolate for dark chocolate to enhance the richness and create a slightly less sweet treat.
- Peanut Butter and Jelly Balls: Add a small dollop of jelly to the center of the peanut butter mixture before rolling into balls.
- Holiday-Flavored Balls: Add a touch of cinnamon, nutmeg, or pumpkin spice to the peanut butter mixture for a festive twist.
A Versatile Treat for Every Occasion
While Peanut Butter Balls are a staple during the holiday season, they’re not limited to Christmas. Their simplicity and universal appeal make them suitable for birthdays, Valentine’s Day, or as an everyday snack. You can even incorporate them into other desserts, such as using them as toppings for ice cream or crumbling them over a chocolate mousse.
For those who love batch cooking, Peanut Butter Balls are an excellent option. You can double or triple the recipe, freeze them, and pull out a batch whenever a sweet craving hits. Their small size also makes portion control easy—though it’s hard to stop at just one!
Conclusion
In today’s fast-paced world, recipes that are quick, easy, and rewarding are a must. Peanut Butter Balls tick all these boxes while delivering on taste and presentation. Whether your readers are looking for a foolproof holiday treat, a giftable sweet, or a kid-friendly activity, this recipe is guaranteed to bring joy. Its adaptability also means it can fit into any culinary tradition or dietary requirement, making it accessible to everyone.


